On-Board Computer: Setup & Installation
On-Board Computer Details#
SOM : Orin NX
Carrier Board : Forecr DSBOARD-ORNXS
[To enable both USB Ports]
USBHS1 is enabled by default but not the USBHS2, rather it is available on M.2 Key-E slot for Bluetooth, therefore to enable USBHS2 port, switch the slide switch to ON position.
Refer DSBOARD-ORNXS Bluetooth Switch.
Mechanical Setup [WIP]#
Installation of heatsink:#
OS Installation#
Including the Kernel Files in Jetson OS Image#
note
You have to first include the kernel files in Jetson OS image – This is a one-time process.
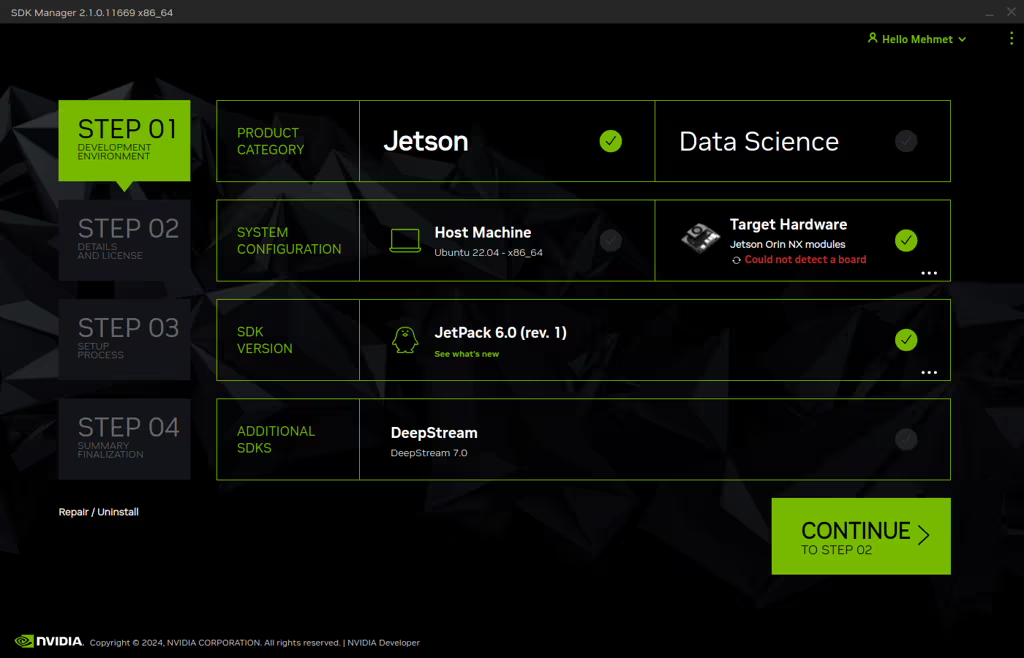
Open the NVIDIA SDK Manager. Select the correct JetPack version for Target Operating System and select the correct module for your installation (“Jetson Orin Nano modules” or “Jetson Orin NX modules”). The “Host Machine” components are not required.
Then, continue to Step 2.

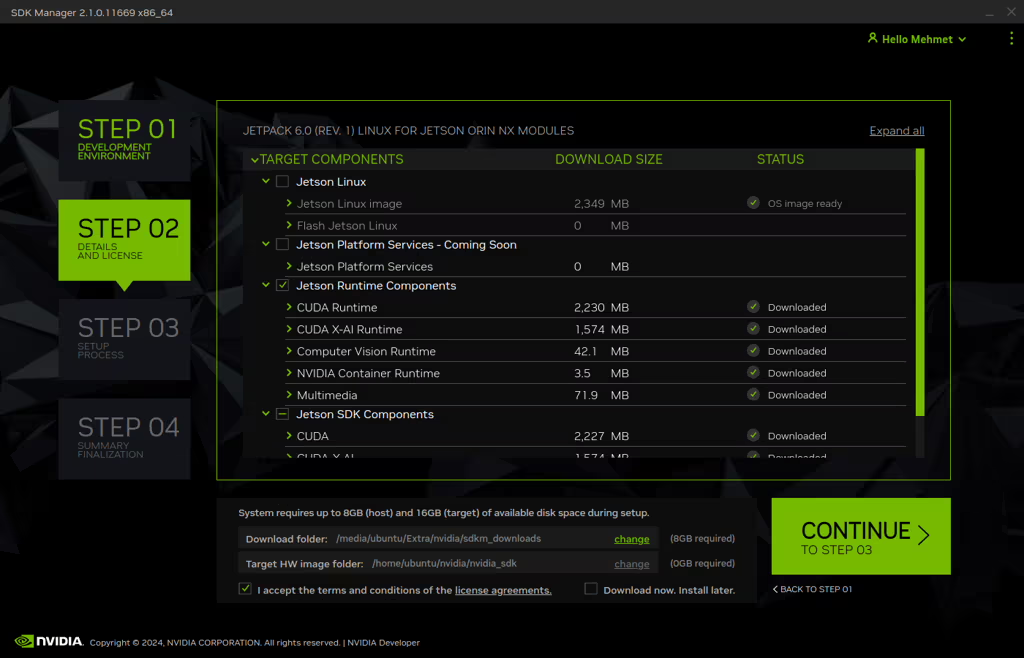
Choose only “Jetson Linux”, accept the terms & conditions and continue to Step 3.
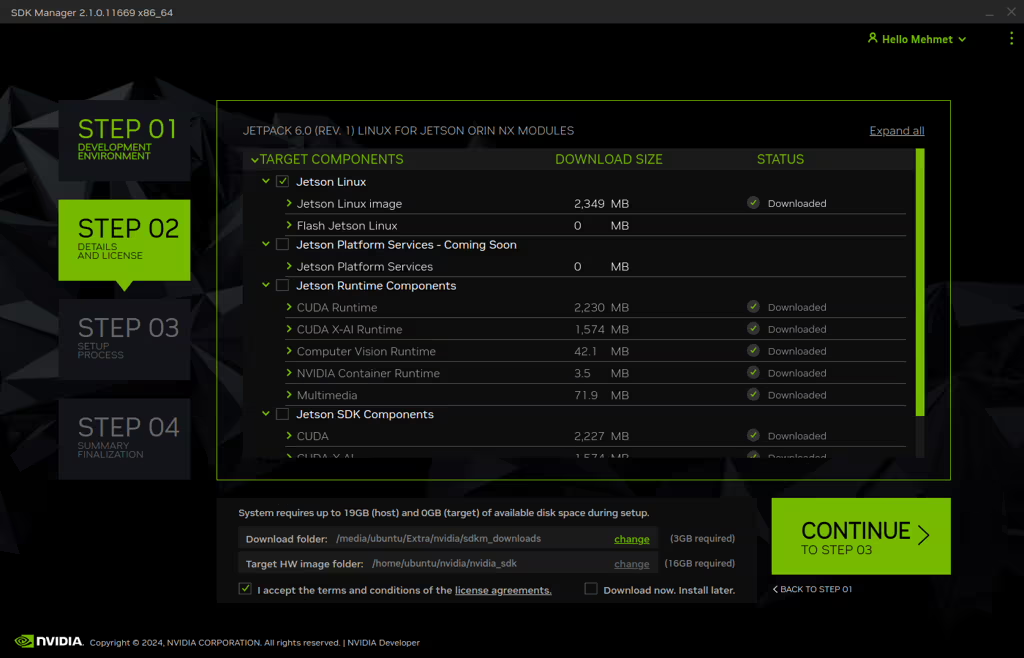
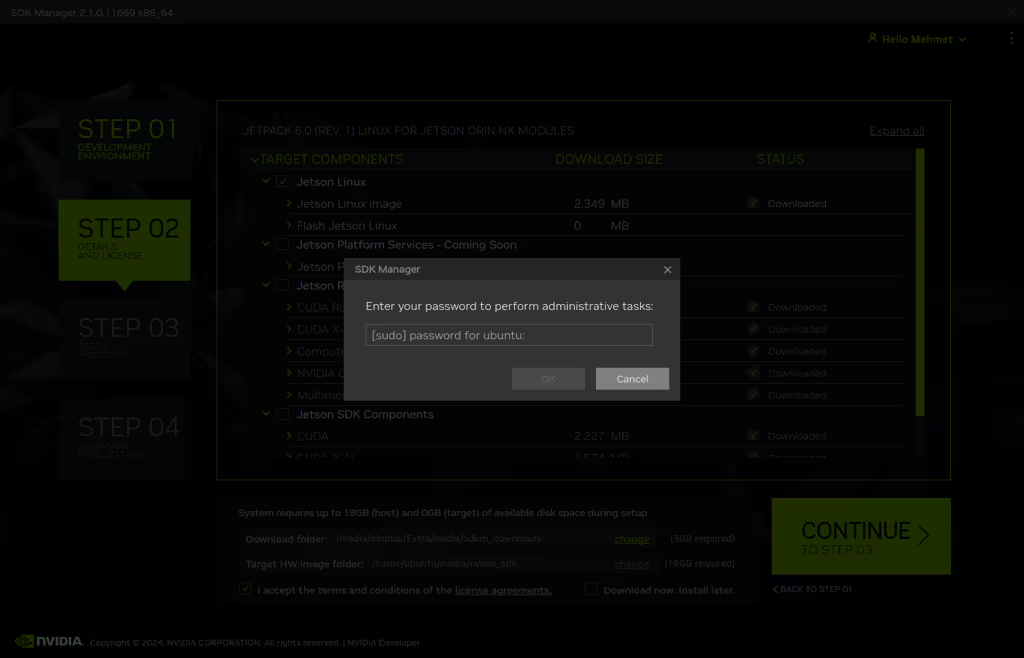
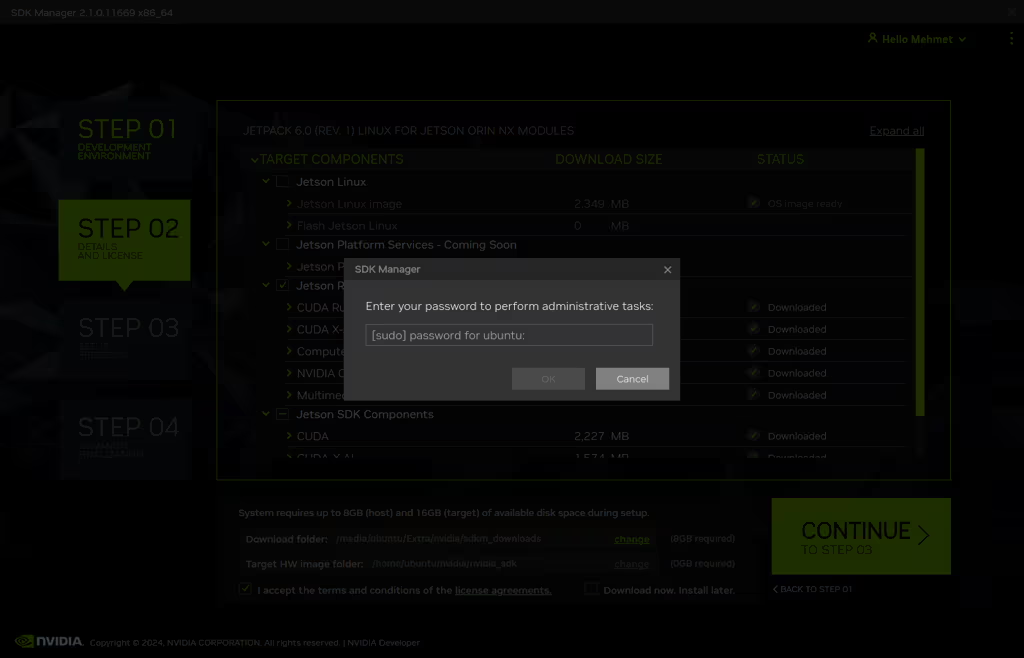
The SDK Manager will ask the username’s password. Fill it and continue.
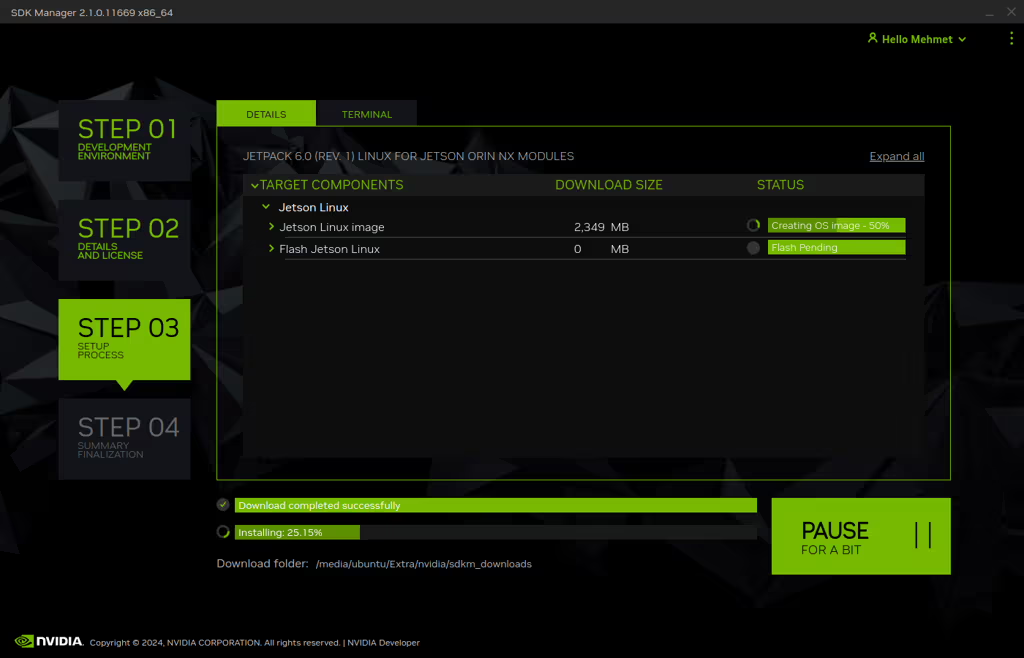
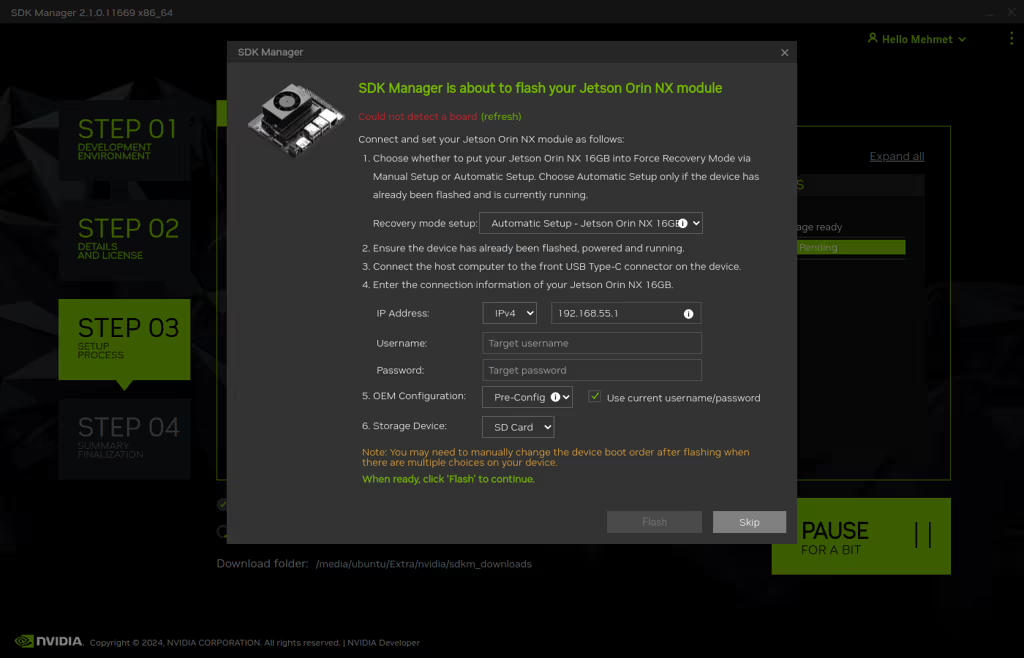
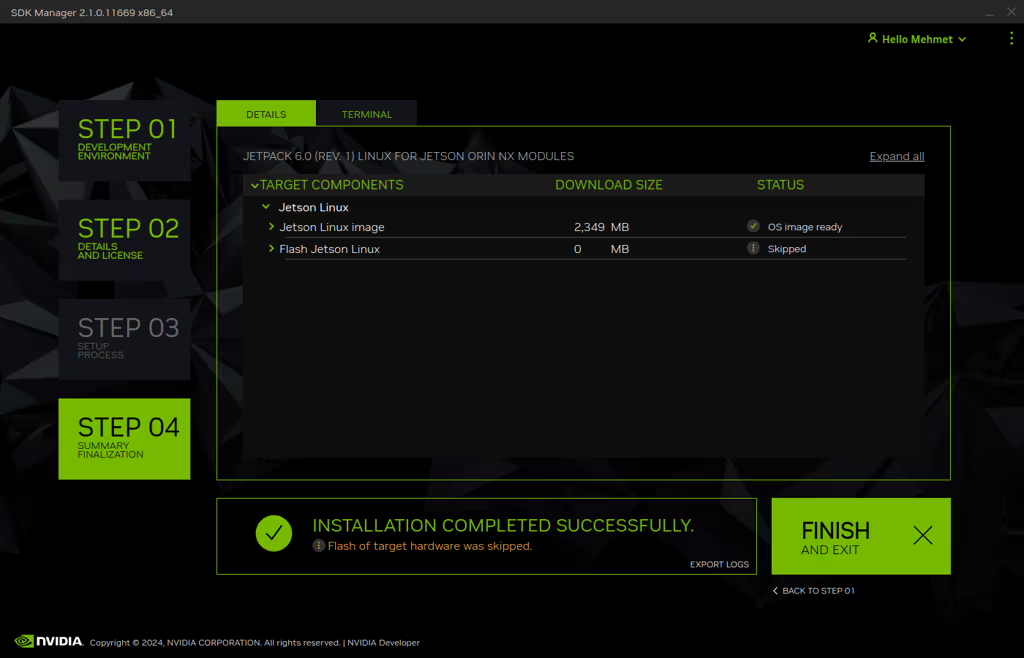
After the Jetson OS has been created, the SDK Manager asks the Jetson module’s flashing style. Just skip it and exit from the SDK Manager.
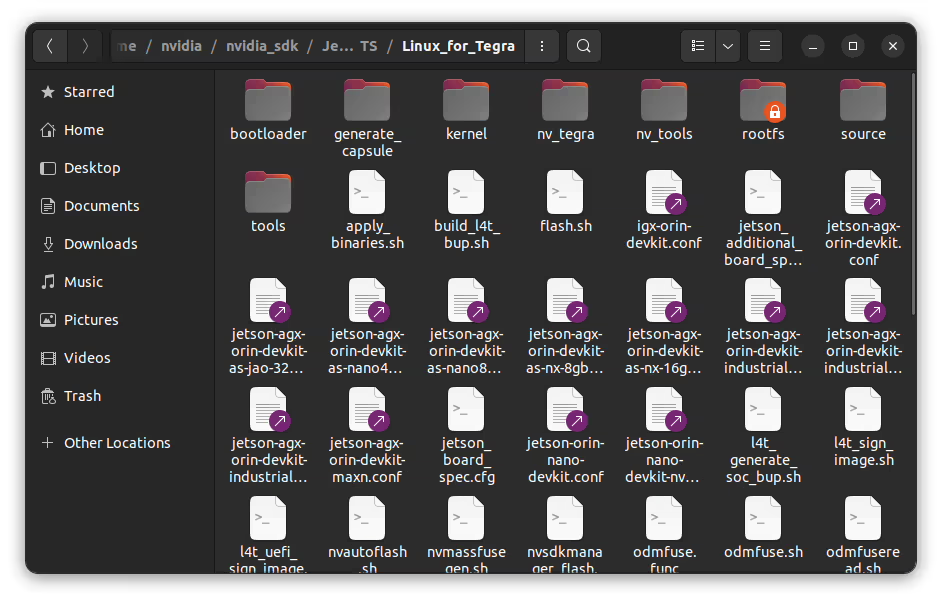
Open the target HW image folder.
For JetPack-6.0 Orin NX: ~/nvidia/nvidia_sdk/JetPack_6.0_Linux_JETSON_ORIN_NX_TARGETS/
For JetPack-6.1 Orin NX: ~/nvidia/nvidia_sdk/JetPack_6.1_Linux_JETSON_ORIN_NX_TARGETS/
For JetPack-6.2 Orin NX: ~/nvidia/nvidia_sdk/JetPack_6.2_Linux_JETSON_ORIN_NX_TARGETS/

For JetPack-6.0: Download the BSP files from GitHub link and extract it (Orin NX).
For JetPack-6.1: Download the BSP files from GitHub link and extract it (Orin NX).
For JetPack-6.2: Download the BSP files from GitHub link and extract it (Orin NX).
Hint: The following steps have done for Orin NX, but they are the same for the other Jetson module types (only the BSP files are different).
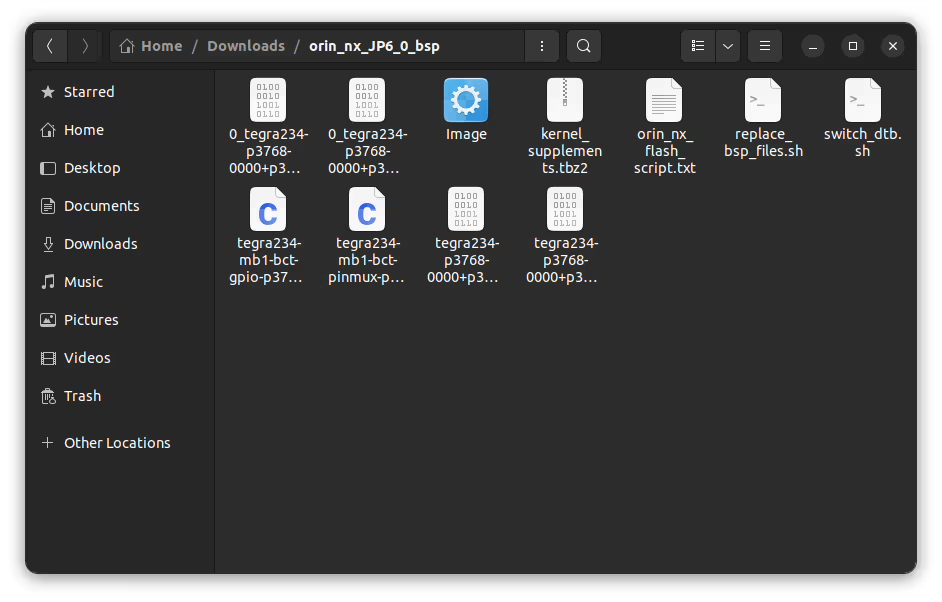
Copy all files to the target HW image folder.

Open a Terminal in the “Linux_for_Tegra” folder.
Create the system binaries with these commands below:
sudo ./tools/l4t_flash_prerequisites.sh sudo ./apply_binaries.sh 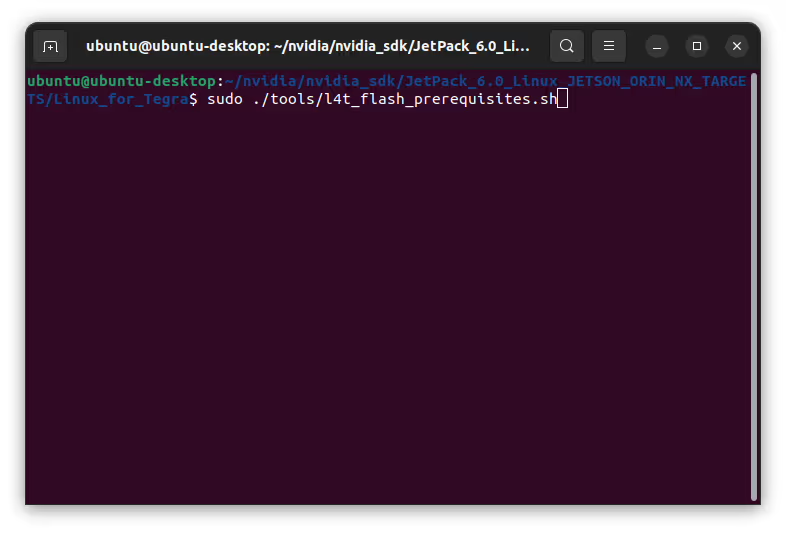
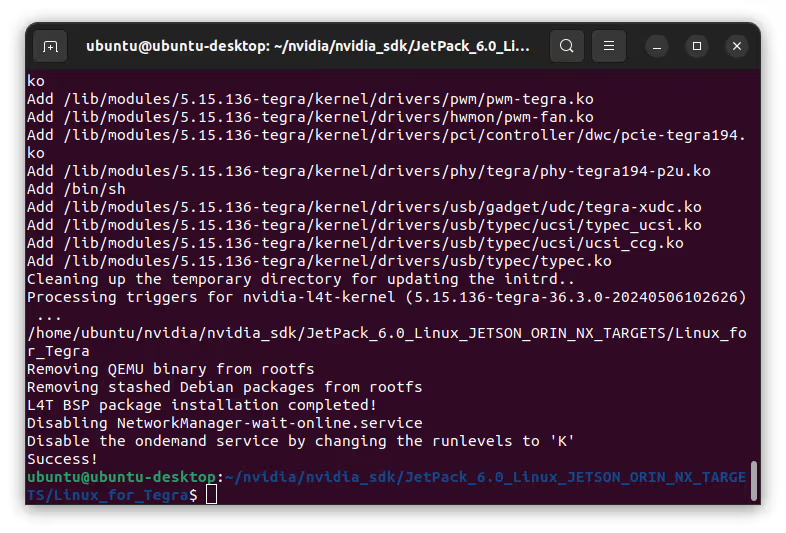
Apply the new BSP files and interface configurations with the following commands below:
cd .. sudo ./replace_bsp_files.shcd Linux_for_Tegra/ 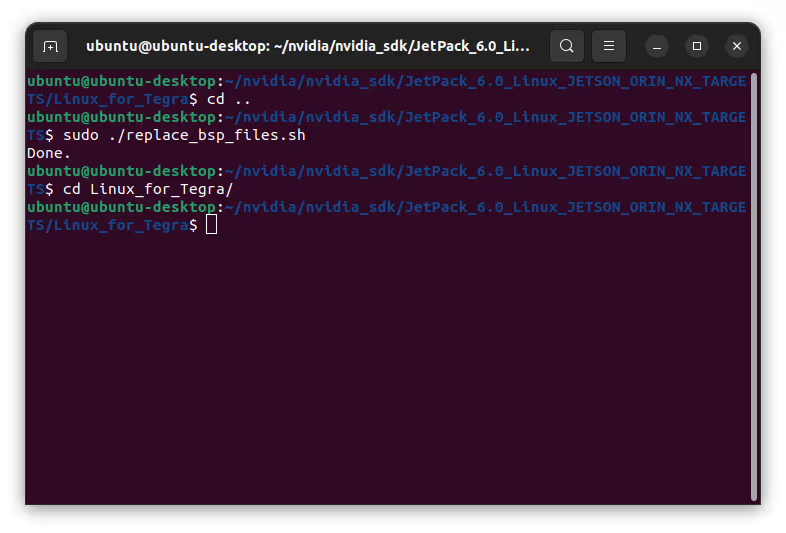
Hint: If you want to configure your username-password & hostname with default settings, you can create user without the Ubuntu installation wizard. To do this, the user generation command structure should be:
sudo tools/l4t_create_default_user.sh -u {USERNAME} -p {PASSWORD} -a -n {HOSTNAME} --accept-license For example (username:"nvidia", password:"nvidia", device-name:"nvidia-desktop"):
sudo tools/l4t_create_default_user.sh -u nvidia -p nvidia -a -n nvidia-desktop --accept-license - After the above steps, you would have an OS image ready with your preferred Jetpack version, now the below steps can be followed to install the OS onto the ORIN NX
Jetson OS Installation#
Connect the recovery USB (between installer PC & DSBOARD-ORNXS's recovery USB) and power connection of your DSBOARD-ORNXS.
While plugging the DSBOARD-ORNXS's power connector,
• press and hold the reset & recovery buttons together
• release reset button
• release the recovery button after 3 seconds later. This will set it to Recovery mode.
Attention: To be able to get more stable USB connection, please do not connect the Jetson via a USB hub or docking station to the host PC. Use a USB cable to the host PC directly.
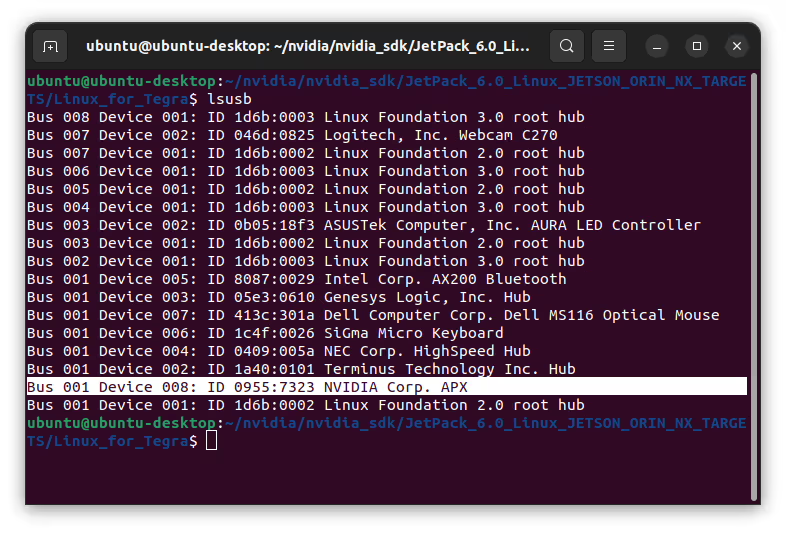
Then, type lsusb and check the device connected in Recovery mode.
• "0955:7323 NVidia Corp." for Orin NX 16GB
Flash the Jetson OS with this command below:
sudo ./tools/kernel_flash/l4t_initrd_flash.sh --external-device nvme0n1p1 -c tools/kernel_flash/flash_l4t_external.xml -p "-c bootloader/generic/cfg/flash_t234_qspi.xml" --showlogs --network usb0 jetson-orin-nano-devkit internaIf you want to flash with Super Configuration (since JetPack-6.2), you can flash it with:
sudo ./tools/kernel_flash/l4t_initrd_flash.sh --external-device nvme0n1p1 -c tools/kernel_flash/flash_l4t_external.xml -p "-c bootloader/generic/cfg/flash_t234_qspi.xml" --showlogs --network usb0 jetson-orin-nano-devkit-super internal 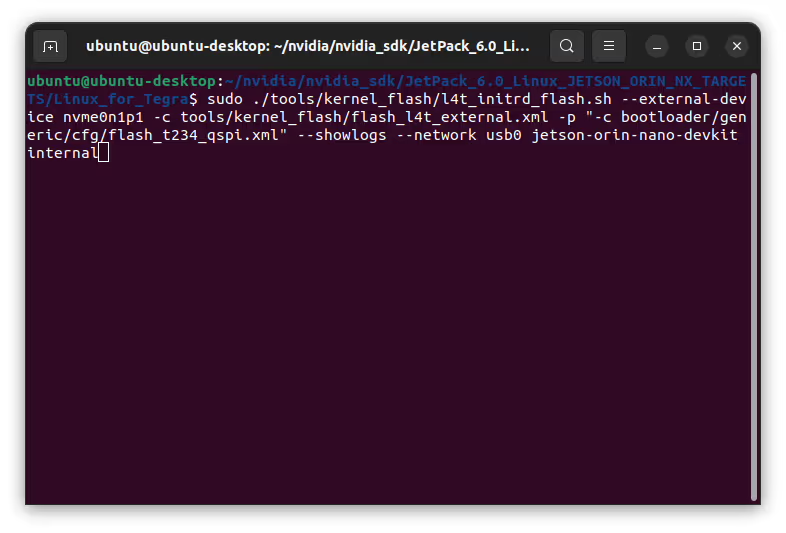
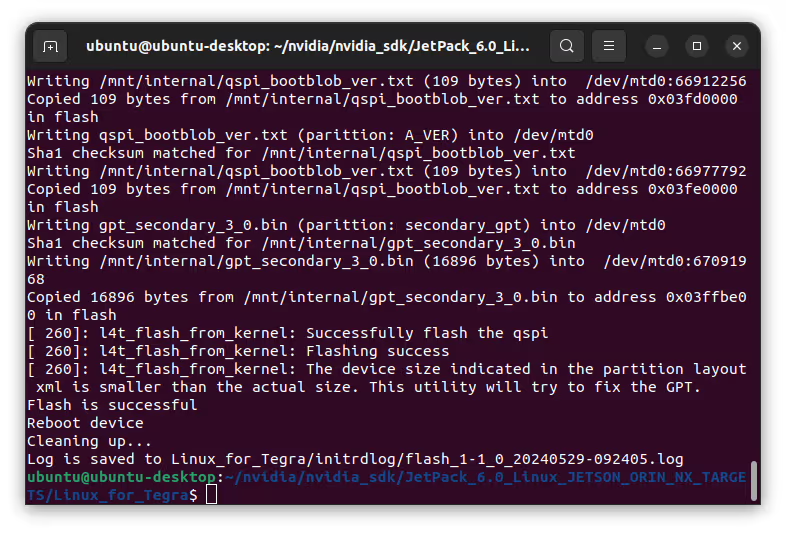
At the end of the script, the device will reboot. Complete your Ubuntu installation wizard (if you have not created a user with tools/l4t_create_default_user.sh script file) from the DSBOARD-ORNXS (language, keyboard type, location, username & password etc.).
Below steps are performed on the OrinNX
[Optional] If you will use the recovery USB port as host (to be able to connect USB-2 & USB-3 devices), please verify that the FDT parameter has been applied in the extlinux.conf file. In JetPack-6 installation, this parameter may not included in it. If this parameter is missing in it, please open it with a text editor and write "FDT" with the DTB file (located in the /boot/dtb/ folder).
#Add the below line to use the recovery USB port as hostFDT /boot/dtb/kernel_tegra234-p3768-0000+p3767-0000-nv.dtb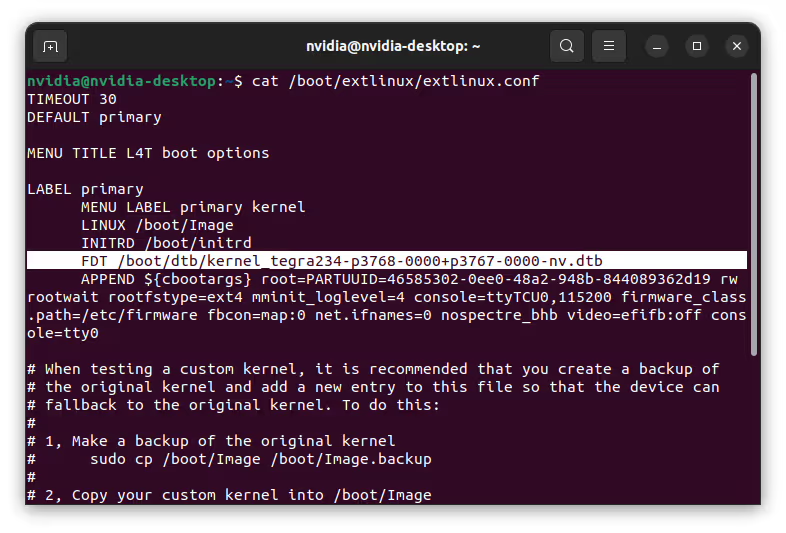
Then, please open a terminal from the Jetson Orin and type the following command below. This will update its current device-tree and reboot it.
Otherwise, you can use this port for virtual network communication (file transfer etc. between host PC with 192.168.55.1 IP address) in default.
sudo switch_dtb.sh 
Jetson SDK Components Installation#
Connect the DSBOARD-ORNXS to the Ethernet. Then, open the NVIDIA SDK Manager. Select the correct JetPack version for Target Operating System and select the correct module for your installation (“Jetson Orin Nano modules” or “Jetson Orin NX modules”). The “Host Machine” components are not required. (Additional SDKs (DeepStream) are optional).
Then, continue to Step 2.
Choose at least “Jetson Runtime Components” (“Jetson SDK Components” are optional. It depends on your use case), accept the terms & conditions and continue to Step 3.
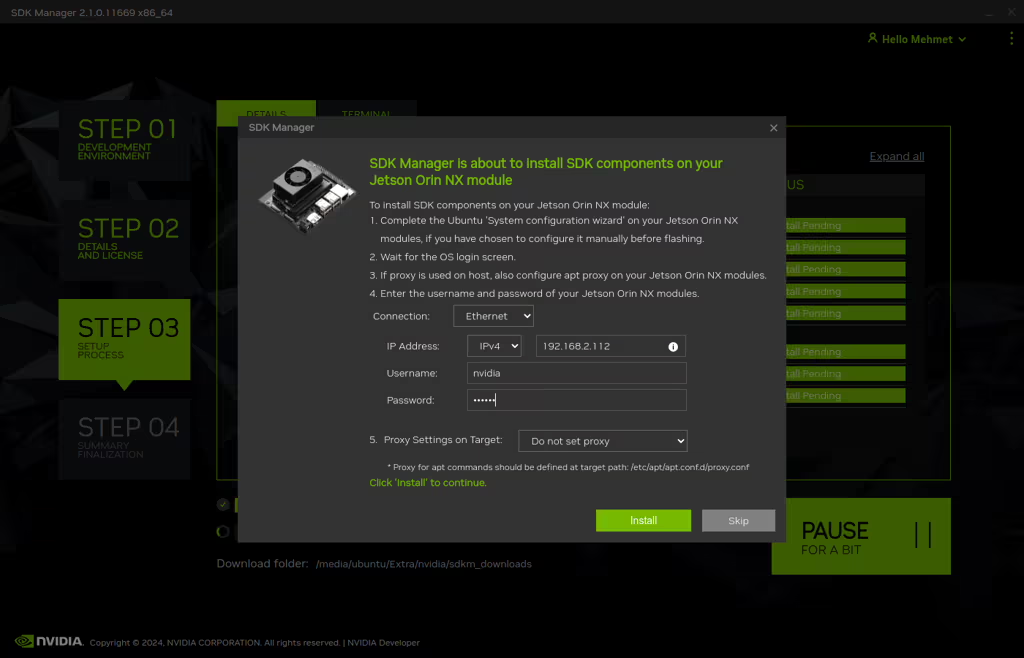
The SDK Manager will ask the username’s password. Fill it and continue.
Type the IP address, username and password of Jetson Orin module and install the SDK Components.
At the end of the installation, the DSBOARD-ORNXS becomes ready.
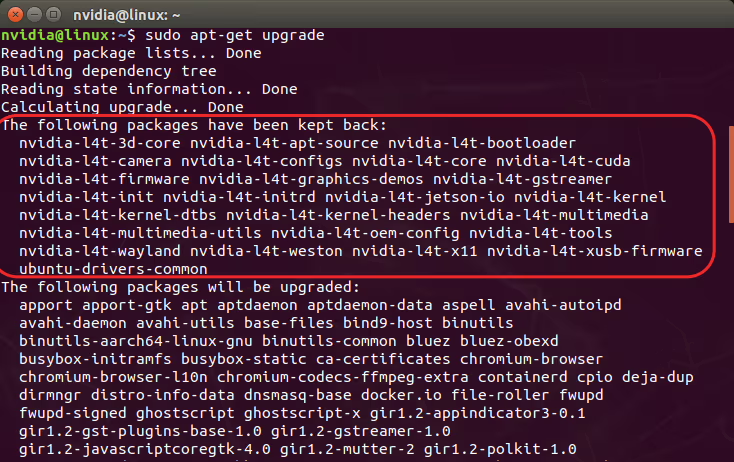
How to Apply Distro Upgrade (apt upgrade) on Jetson Modules?#
Below steps will prevent the L4T packages’ upgrading on “apt upgrade” or “apt-get upgrade” commands. First, we will hold the “nvidia-l4t-*” packages to upgrade. Then, we will upgrade our all packages without them.
Holding the L4T Packages#
Open a terminal and type this command below:
sudo apt-mark hold 'nvidia-l4t-*' 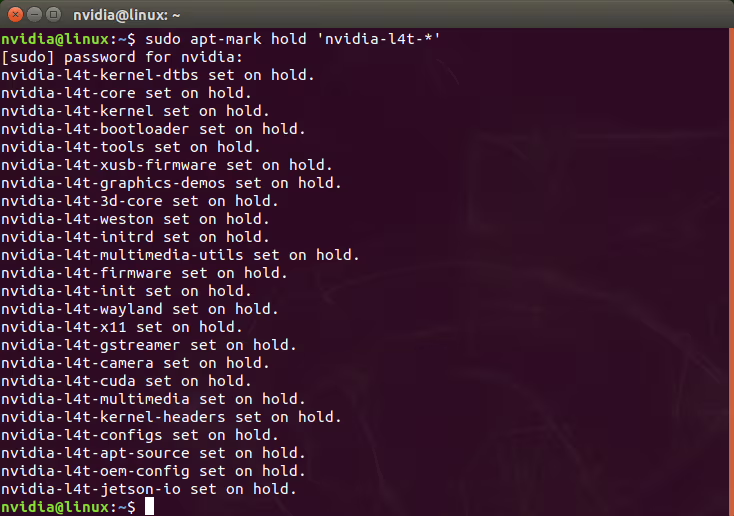
As you can see that, all “nvidia-l4t-*” packages set on hold.
Now, let’s update all packages with APT.
Upgrading All Packages Without L4T
To check the updates on all packages, type this command on terminal:
sudo apt-get update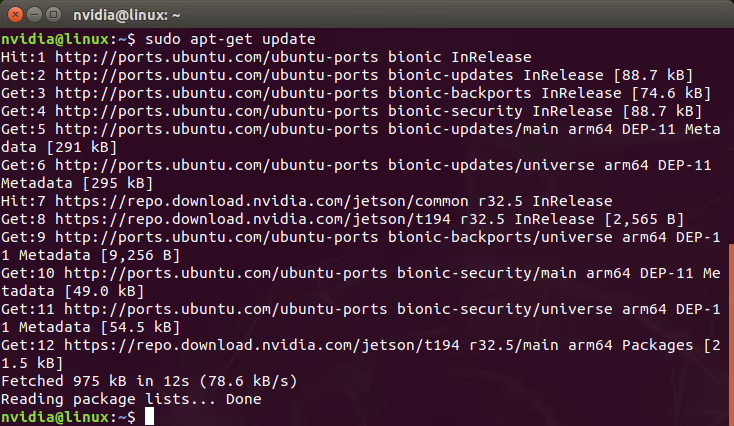
Then, you can try to upgrade them:
sudo apt-get upgradeAt the beginning of this command, you can see all hold packages will keep back.